Tuesday, January 26, 2016

building Tim Manney's Shave Horse design


It has been a while since I posted anything from my shop activities. I've wanted to build another shave horse for quite some time and have been looking around for just the right plans / idea. Part of what I was after was a dumb head style as I have and use the Brian Boggs style “mule". 

Brian Boggs style mule

When doing long chair parts it is a little annoying to have to thread the part through the head to turn it around or go end to end. Surly not the end of the world or a great hold up as there is only one bow or one arm per chair. Just wanted to try a different style. The other reason is that I can now make multiple heads and try out Peter Galbert's ratchet head. I also want to design and make a spoon carving / plier type head all using the same base platform. I love carving spoons on the shave horse. The draw knife is an amazing tool. Faster than a hatchet with more control and accuracy. My other goal was to make a very simple horse from readily available construction type materials. 2x4's 2x8's I chose to follow Tim Manney's plan and I veered off in only a few places. 

full side view

It is awfully hard to go buy wood when I have piles of wood air dried in the barn. I live next door to an Amish saw mill and the EAB (emerald ash borer) has reached my little patch of woods. I will likely be taking down at least 20 ash trees many around 20” dia at breast height.

treadle from underneath


I am not sure what it is, but I just can't seem to keep it simple. Posted in my shop I have a little shaker quote that reads

Don't make something unless it is both necessary and useful;
but if it is both necessary and useful,
don't hesitate to make it beautiful.
-Shaker Dictum-

With that I dressed it up in a few places. First I used ash from my woods instead of southern yellow pine. 

right side

components
 

Then I added a few curves to lighten things up in terms of the angular lines. 

Rear view
 

And I had to take Tim's advise and carve a quick seat. He is right- it is very comfortable. Anyone recognize the “perch” pattern?

Seat
 

One of the things that drew me to Tim's plan was he had done such a nice job of laying out his process and plans seemed clear. I made some quick drawings and dimensions with a list of the parts and off to the shop I went …..you can't believe how many times I came back to his blog and studied his posts to get some little detail that I had missed. He has done an incredible job of laying out the process and giving all the needed dimensions, but there is just more than meets the eye at first blush. 

Rear leg attachment
 

Tim suggested that you use hard wood for the tapered draw pins......well I have been hording this rose wood for years and I have ten of these 2x2's 60” long, do you think I could spare 6” for this project. It was about time. Not often that I use Rosewood and what a pleasure to plane and scrape. I chose to use a single 1/2 inch bolt to secure the rear legs.

Users view
 

I used some leather for the champs (faces of the vise) and was so pleased that I added some to the Boggs mule I built a few years ago. Nice up-grade. Now with two horses I can have one at my shop in town and one at home and never want for the other.

Head and view of pin


As for a finial assessment, The pin type adjustment will take some getting used to but works quite well. Some sort of stop for the pin would be nice, just can't figure out a simple answer. Tim mentions that he is short so one should make sure the height of the platform and the height of the horse off the ground are right for your own size body. I found his dimensions very close to what I like and comfortable. My trestle is 18 “ above the floor and my platform at its front edge is 10 1/2“above the trestle. The Boggs mule is only 57 " long and Tim's is 64". Both are perfect Tim's just takes up a little bigger foot print.


Monday, May 28, 2012

Solar Beeswax melter


-->

Putting the sun to work melting bees wax is quite a pleasure. I say this having hijacked pots from the kitchen and made them quite a big mess to clean up. Not worth the trouble. So I fabricated this solar wax melter and it works better than I ever thought it would. I put 8 to 10 pounds of wax, honey, propolis and miscellaneous bee stuff into this rig... and out comes bleached wax and pollen infused honey. The photo tells the story, this took about 6 hours in the sun. I still need to paint and make a permanent glass door for the top. Just had to try it out as it was 90 degrees and sunny today.

Saturday, August 13, 2011

Sweet Sweet August


It has been two years in the making and now we have our first harvest of honey. We used to keep bees 20 years ago when it was easy as far as keeping healthy bees. Now it is a bit dicey to get them to winter over because of the mites and diseases. So I guess it is in my blood, and to get 100 pounds of honey from two hives while leaving the bees 70 or 80 pounds for themselves to get them through the winter is just too much fun. To give you an idea, 100 pounds is about 8 gallons of an incredible local food / sugar with enzymes and pollen for our health. Without the help of my son Dan and my life mate Kathie, it would have never happened ...Thanks to both of you.

Tuesday, March 23, 2010

Maple sugar candy

We decided to take our syrup hobby to a new level and ty our hand at some confections. In our pursuit we were gifted with a candy mold (Thanks Mom) and here are the results of our first attempt.
Danny ,our son, says they are addictive. I think he may be right.

Sunday, January 10, 2010

Wet Panel Carrier

"Wet Panel Flat File"
This is a unique storage solution for storing wet painting panels and canvases while on the road. I made the first wet panel carrier for my wife Kathie Wheeler ( see her web site and blog links at the beginning of this blog) when she was headed to a "plein air paint out" in Cedarburg WI a couple of years ago. She was thrilled with it as all the wet painting were protected and organized in one place. In prior years the paintings were laying all over the car, balanced on suitcases and the backs of seats..... a little precarious to say the least. She now finds the "Wet Panel flat file" handy in her studio as well. The photo above shows the carrier all buttoned up with the front door closed. Below I show it open with some of the drawers pulled out.
This little box will hold up to a 14" X 18" wet panel or stretch canvas (less than 1" thick) and any size smaller than 14" X 18". Two 8" X 10" panels will fit on one of the 9 pull out shelves. Unlike the suitcase style panel carriers the wet panels are laying on the shelves, and are not held into a groove or held in place with clips or adapters. This is not designed to take on a plane; it is designed to put in the car or camper and hold multiple panels or canvases of varying sizes completely protected.
Also available is a16" X 20" with 6 pullout shelves. This is now an essential piece of gear for any Artist-workshop or paint-out that Kathie attends. Think of it as a car sized flat file for paintings on the road. Kathie and many of her friends and fellow artist have found this a useful tool at paint-out events, workshops and painting trips in the car. If you would like to purchase one of these contact me at ts.wheeler@gmail.com

Woven seat for post and rung rocker

We have had this old chair around for so long I can't tell you where it came from. Suffice it to say, it came to us unencumbered, meaning it had no seat. I was trying to think of an alternative material to replace the paper cordage seat that was all but gone when we took over the job of caretaker for this simple and small bundle of sticks. Well, I was at the hardware store and saw this nylon cordage in 50' bundles, light-bulb , yes this could look very nice and a bit unique. After my daughter was able to decipher a picture in Drew Langsner book (The Chairmaker's Workshop),we went to work and here is the result.
As you can see, it didn't perfectly fill in all the space on the stretchers, For a first try it looks pretty good and it is stout. It has only loosened up the slightest bit and that is with people taking turns sitting in it as it is like having a new guest in the house. That is to say, it is getting a lot of attention.

Saturday, October 24, 2009

Ash Hall Tables with Ash Framed Mirrors


Here are the hall tables installed in the apartment building in Evanston.
I think they give a warm feeling to a very nice public entrance to these flats.

Sunday, August 16, 2009

Ash Hall Tables

This is an Ash table that I was asked to create for an entrance lobby in an apartment building in Evanston Ill. This table is 60" wide and 18" deep. We designed it with just the front legs so that it could be fastened to the wall. It will make a warm and homey feeling for the residents of the building. I will post another photo when it is installed with the matching ash-framed mirror.


This is through the next door and on the way to the laundry room. Only 6" deep and 30" wide, but a nice addition to another otherwise bare space.

Saturday, May 9, 2009

They just keep coming

Instead of finding ones and twos we found several larger groups this morning.

Friday, May 8, 2009

Morels for Supper

I have been working in the shop and will show off my labors soon, but for now the morning break was spent with a rite of spring around here, hunting morels. We already ate about half of them for lunch. What a treat!

Sunday, March 29, 2009

It's getting darker


1st three batches , from light to dark. We're into what should be a good run as the temps are cold at night and warm during the day. The volume of sap is amazing.

Wednesday, March 18, 2009

The end product

Here is a sample for color comparison of the two batches that we have finished so far. It is interesting, the experts say that as the season goes on the syrup gets darker.........thats what they say. In this case we did a better job of keeping our second batch boiling and it turned out a bit lighter in color. I can't say I can tell the difference in flavor between the two. But maybe when we get to the end of the season there will be a difference. I'll let you know. Next boil, maybe Monday?

Monday, March 16, 2009

Haul and boil.......

Boiling pan

Just started a fresh batch and got 15 gallons to a boil in 40 min. The system is working great and I just wish that I had more trees to tap


Hauling in from the woods

This part is more work than one thinks it might be when contemplating this venture. Soon we will have some sweet sweet syrup to dribble over sourdough pancakes. If I could only make a living having this much fun!


Sunday, March 15, 2009

Door knobs

Mushroom style pull 3" dia
I couldn't resist , I needed to put some sort of pull on the door to the sugar shack and so I turned a couple of different styles as an exercise and to add a little class to an otherwise dilapidated old building (that I might add has a new life and will now be cared for with a new attitude.)
Colonial style 3" dia
This is the more ornate of the two and my mate requested that I put it on the inside where it is more protected. They may look nice but they are just knobs to pull the door closed.
by the way: we will be boiling Monday morning as we are in a good run and we have 50 gals of sap gathered and ready to go.


Friday, March 13, 2009

Maple syrup

Here's a shot of the old ice house that the previous residents ,the Amish, used for ice and we are now useing as a sugar shack. It keeps us out of the wind and a little warmer on the cool nights boiling sap.


For a bit of a change from my woodworking I just finished our maple syrup evaporator pan and wood fired arch. We just ran our first batch of 35 gallons of sap through the process with all its inherent difficult moments and we learned a lot. What fun! The door is open just to help show what is going on.

Wednesday, January 28, 2009

Dusting Brushing


Dusting brushes
11 1/2" long birch and 8-1/2"long cherry burl

Basting Brush


Basting Brush
8-1/2" birch

Sunday, November 9, 2008

Walnut Toothpick Holder

Walnut toothpick holder
2" w x 2 5/8" t

Walnut Sphere


Walnut Sphere
5" dia, 1kg

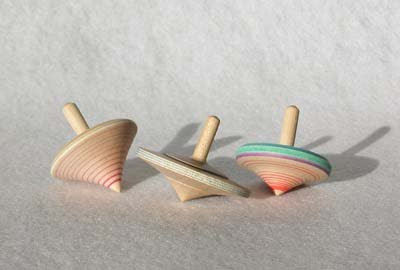
Decorated Tops

Decorated Tops